Heater
Equipment
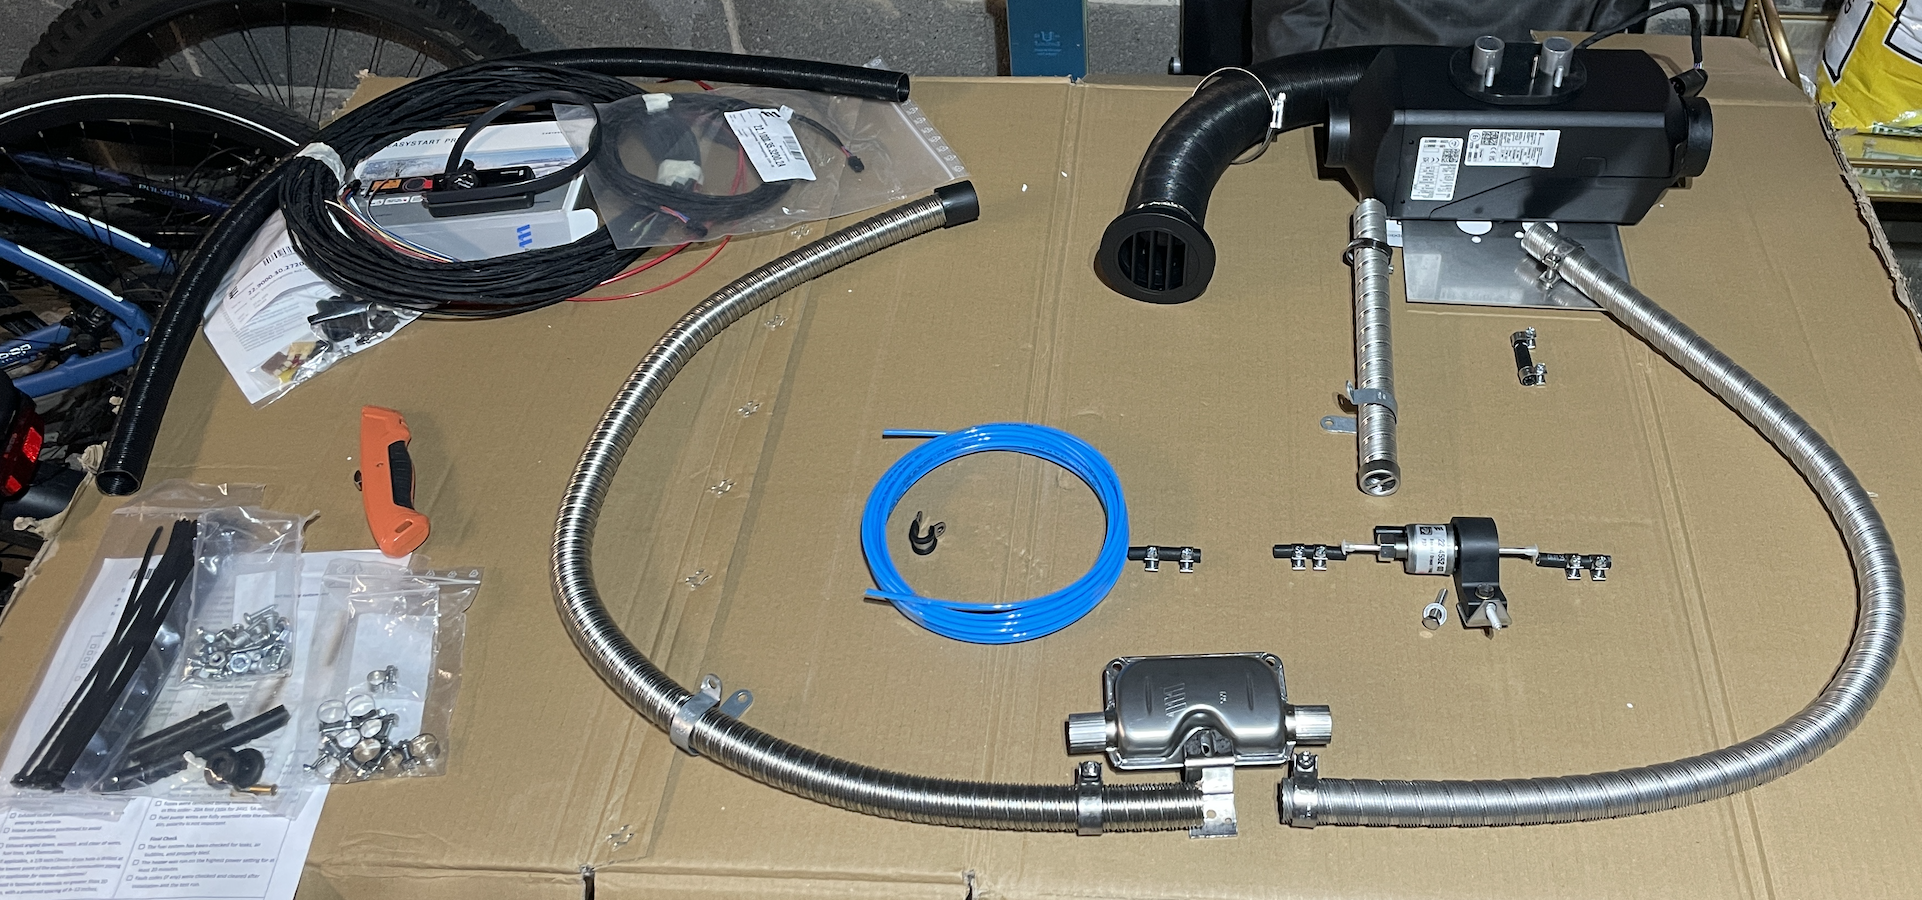
- Espar Airtronic S3 D2L Diesel 12V Sprinter Kit with EasyStart Pro Controller
- Purchased kit from Heatso
- order #46088
- $1,577.95
- Purchased kit from Heatso
Tools/Materials
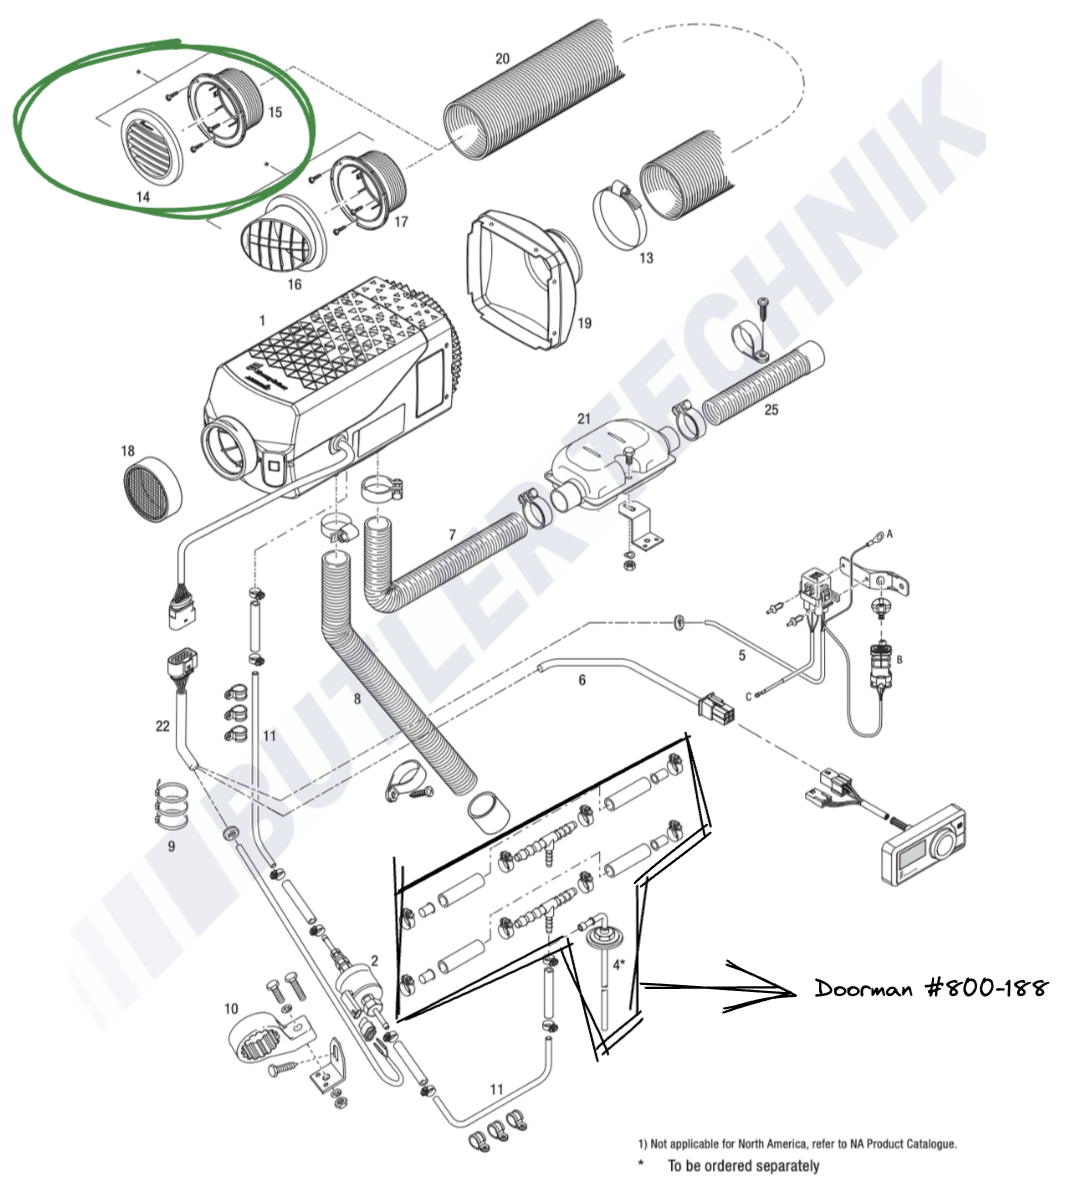
- Doorman #800-188 Quick Connect
- E-star socket for seat
- star/torx socket set for various van screws
- ratchet handle/kit
- torque wrench 1 - x newton meters for hose clamps and seat bolts
- paint marker for marking selt bolt tension?
- Stepper bits for combustion inlet/outlet
- xxx drill bit for bolt holes
- xxx drill bit for fuel line hole
- 2 1/2" metal hole saw for hot air outlet
- deburr tool/file/sandpaper for rust prevention
- isopropyl alcohol
- primer for rust prevention
- sealant for heater base
- safety glasses/goggles. goggles for 360 degree protection working under the van.
- wire tools. crimp, strip, cut, connectors?
- knee pads? Something to roll under van on?
Plan
Dry fit and gather materials
We should assemble the fuel line and hot air outlet as much as possible outside the van before installing the heater.
 My layout
Start at the auxiliary fuel connector and work your way to the fuel line, assembling and installing anything not connected to a variabele length line. Plan mounting point for the fuel pump and fuel line clamps. We should use pre existing holes/bolts wherever possible. For the cold air inlet, may be able to mount inside the frame tube without additional mounting points. For the hot air exhaust, plan mounting point for the muffler. Route the exhaust line away from the sliding door. Air lines may require drainage holes for condensation if not continually sloping downward.
Take off the seats
To remove the seats you must first disconnect the battery. Need to wait x minutes after turning off the engine before disconnecting the battery. [ ] steps to disconnect battery Need to wait x minutes after disconnecting the battery before disconnecting the seat electrical connectors. Mark the tension on the seat bolts with a paint marker. Use E-star socket to remove the 4 seat bolts. Set the seats aside.
3d print hole template with center points
The rubber gasket that comes with the kit cannot be used for a hole template since it stretches to fit. Make an accurate template using diagram from installation guide and make sure it accurately fits the heater base. Make sure the device will fit as intended and the hot air hose can be routed as desired before continuing.
Drill Mounting Holes
There is a recess in the van floor under the passenger seat thats meant to be used for a heater. We will use this position for mounting. The hot air outlet should face the back of the van once installed.
3d print hole template with center points
The rubber gasket that comes with the kit cannot be used for a hole template since it stretches to fit. Make an accurate template using diagram from installation guide and make sure it accurately fits the heater base before using it to mark the holes and center points.
Drilling the holes
- Bolt holes
- xxx drill bit
- Fuel line hole
- xxx drill bit
- Combustion inlet/outlet holes
- drill pilot hole in center
- use stepper bits to drill to size
Ensure the device fits the holes at this point.
Rust prevention
- deburr/file the raw edges of the holes
- vacuum metal shaving
- use isopropyl alcohol to clean the area
- use primer to paint the edges of the holes with a q-tip or dobber
Mounting the Heater
We will put the rubber gasket on the heater first, and then apply high temp sealant around the holes. We will apply to the gasket instead of the van floor to avoid fouling the fuel line with sealant. Install the heater into the floor. Apple sealent to the holes outside the van also, then hand tighten the bolts to dry, per manual.
External Air Lines
Mount the cold air inlet line to the heater with line clamp, then find where the line clamp for the end of it can be mounted. Mount the muffler under the van in reach of the first section of hose. Attach the hose to the hot air outlet then then muffler. Attach the hose to the mufler outlet and route the hose to its mounting point. The exhaust can be noisy, and has disel fumes, so should be routed to the edge of the vehical away from the door areas.
Interior Hot Air Vent
Will need to drill a 2.5" hole in the seat pedestal for the hot air vent. Use the vent adapter to mark the location of the hole and mounting screw holes. Should be mounted at bottom of pedestal toward van center. The large hole saw makes a mess, so will need to use tape trap to catch the metal shavings. duburr, clean, prime the raw edges before installing the vent.
Electrical
- power
- thermostat/controller
Plug in the heater wiring harness. Lift the factory floor and route the the wires under the driver seat. Will need to remove some equipment to access the wires. Route the fuel pump wires out the bottom of the van through the existing wire grommet. Attach the wires to the pump.
References
- Installation video (minus electrical)
- find video for electrical installation
- Fuel Installation Guide
- Heater Installation Guide
- site with list of other references
Notes/Questions
- Q: Do i need to buy an aux fuel conenctor, or did it come with my kit?
- A: Yes, it did not come with the kit. Need a Doorman #800-188 Quick Connect
- Q: Which length exhaust pipe goes where? I assume the short one with metal cap must be final exhaust because of heat?
- Q: Where can i mount the thermostat/controller?
- Q: How will I power the heater?
- pre-req: Aux DC Power